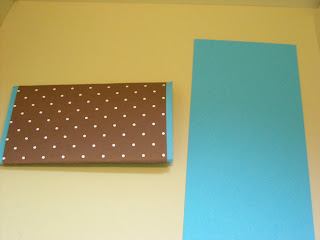
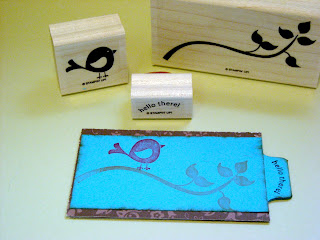
Ok so today I am posting a new card. I am tring different techniques, so I do not have a step by step tutorial quite yet. What are your thoughts on this card?
Tuesday, March 30, 2010
Monday, March 29, 2010
Chocolate Fondant
Ok, so this is not card related, but fun to do all the same. I had a request for a skate boarding cake. So I wanted to cover the cake with fondant, but wanted it chocolate flavored. So here is the recipe and a tutorial. Some of the photos are a little blurry, but you will get the idea. I seriously need a better quality camera...
Chocolate Fondant
1 bag of mini marshmallows
2 teaspoons of water
2 teaspoons of corn syrup
1/2 teaspoon salt
1/2 cup of Hershey's unsweetened coaco
2 teaspoons vanilla
1 squirt of lemon or lime juice
Confections sugar
Grease the mircrowave safe bowl really well with crisco.
I use a sandwich bag to prevent my hands from getting greasy.
Grease the spoon as well, it gets pretty sticky!
Dump the whole bag of mini marshmallows into the bowl.
Sprinkle 2 teaspoons of water over the marshmallows.
Microwave on high for about a minute, remove from microwave and stir, mircrowave again for another minute.
It should look like this, with most of the marshmallows melted. When you stir it they should finish melting, if not put them back in the microwave until they are all melted.
Add in cocoa powder, corn syrup, vanilla and stir.
Add in the squirt of lime/lemon juice
Add in confection sugar a little at a time. There is no measurement, just keep adding it until it forms a loose dough
About like this.
Dump the fondant onto a table with a generous amount of confection sugar.
Knead it until it becomes smooth and can hold it's shape
When it looks like this, cover it VERY well in crisco and wrap tightly in saran wrap.
Let this sit for 1 day before you use it.
This is the cake completed. It looked better in person. The flames were vibrant and shiney. So was the graffiti. The fondant tastes just like a tootsie roll! :) Yumm.
Again, it looked better in person. Another thing about this fondant, it does NOT harden. Great for eating, but a pain for decorating.
Enjoy!
Friday, March 26, 2010
Toilet Paper Card
I know, toilet paper card, sounds weird huh?? LOL, well, I have made a mini scrap book using this idea, but I wanted to make a card instead. Here are a few photos of the mini scrap book.
This is the front of the mini album
Three "toilet paper rolls"LOL
Then the pictures. If you all like this it is the same exact idea as the card, you just punch holes on the ends and add the brads and rings. Pretty cute. I had photos on both sides. I made this for my Mother-n-Law :)
Ok, enough about that and onto the card.
Just use an empty roll of toilet paper:)
Now using your scoring tool or the dull side of a butter knife. Flatten out the roll.
Now cut a peice of card stock 6 3/4 inches long by 4 1/4 inches wide. Score at 1 1/2 inches and 4 1/4 inches. You are going to tape this cardstock to the TP roll.
Now tape it really well, especially the edges:)
I did not tape it well enough, so I used a peice of sticky strip to seal it closed. Now the TP roll is completely covered in the blue cardstock.
Ok, then I cut a peice of double sided pattern paper 4 inches wide by 11. I then wrapped it around the teal colored cardstock. I did not score it, I just wrapped it. I tried to scor the first one and it ripped, it is just not strong enough, but I like the look of it wrapped:)
Then just cut off what you are not using.
And againk, using sticky tape, I sealed the edge.
I cut a strip of teal 3" wide by 11 long.
Tape the edge of the teal (you did this with the pattern paper, but I did not take pictures, same idea though)
Tape it on where you want it and then wrap it around the roll.
When you get to the end, tape it real well.
cut off the excess and it is complete
I used the Cheep talk set from Stampin' Up and some gems for the center of the flowers. I also used glossy accents to adhear the flowers.
I used some Copics to make the grass, nothing special about 4 different greens and just made swooshy lines!
Ok, now for the inside. I used a peice of chipboard, (the back of a cereal box) And I cut it to 3 3/4 long by 2 1/4 wide. Yes I made a mistake in the photo, but it is 3 3/4 long:) Then you will cut two peices of pattern paper (the opposite side that you used on the front). Cut them both 3 3/4 long by 2 1/4 wide.
Tape the chip board well and adhere the pattern paper, one peice per side.
It should look like this when you are done.
I cut two teal peices of card stock at 2 inches wide by 3 3/4 inches long
I also punched out a label
I distressed the sides using the Distress Ink and my dabber:)
I added adhesive to the inner part of the label then lined it up on the chipboard stuck it down and sealed the other side as well.
This is what it should look like. The paper gets adhered over the label so it looks like a tab.
I stamped it using gingerbread chaulk ink and some colorbox red ink.The hello there is in black
I used my copic and colored in the leaves. I also used stickles clear on the wings and for the eye.
That is it!! You have a recycled card:) Enjoy!
Subscribe to:
Comments (Atom)


